- A technician will bring the modem below and will complete the activation of the optic fibre at your home. This installation can take from 2 to 4 hours.
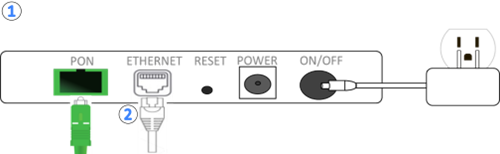
- Connect a network cable into the Ethernet port at the back of the modem. Connect the other end in the "port 1" of the main routeur.
*If you have more than one routeur, the main one has a label underneath with the network name and password. - If you want to connect your computer, television or other devices directly into the router, connect each of your devices into one of the available port at the back of your router.

- Connect the power adapter of your primary router.
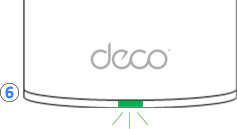
- Wait until the light at the bottom of your routeur is green. It will first light up yellow, then blue. It will then light up in a steady green. This operation can take up to 5 minutes.
If you have multiple routeurs, place them at the desired location you want and connect the power adapter into a power outlet.
You are now ready to connect your devices to your Wi-Fi network.
- On the device you wish to connect, choose the network name that matches the one shown on the label under the DECO router.
- Then enter the password shown on the same label.